

Welcome to JetClock Zero
Thank you so much for purchasing a JetClock Zero. Setup is incredibly simple and should only take a few minutes. No assembly required!
If you run into any trouble, contact us at [email protected].
What's in the box
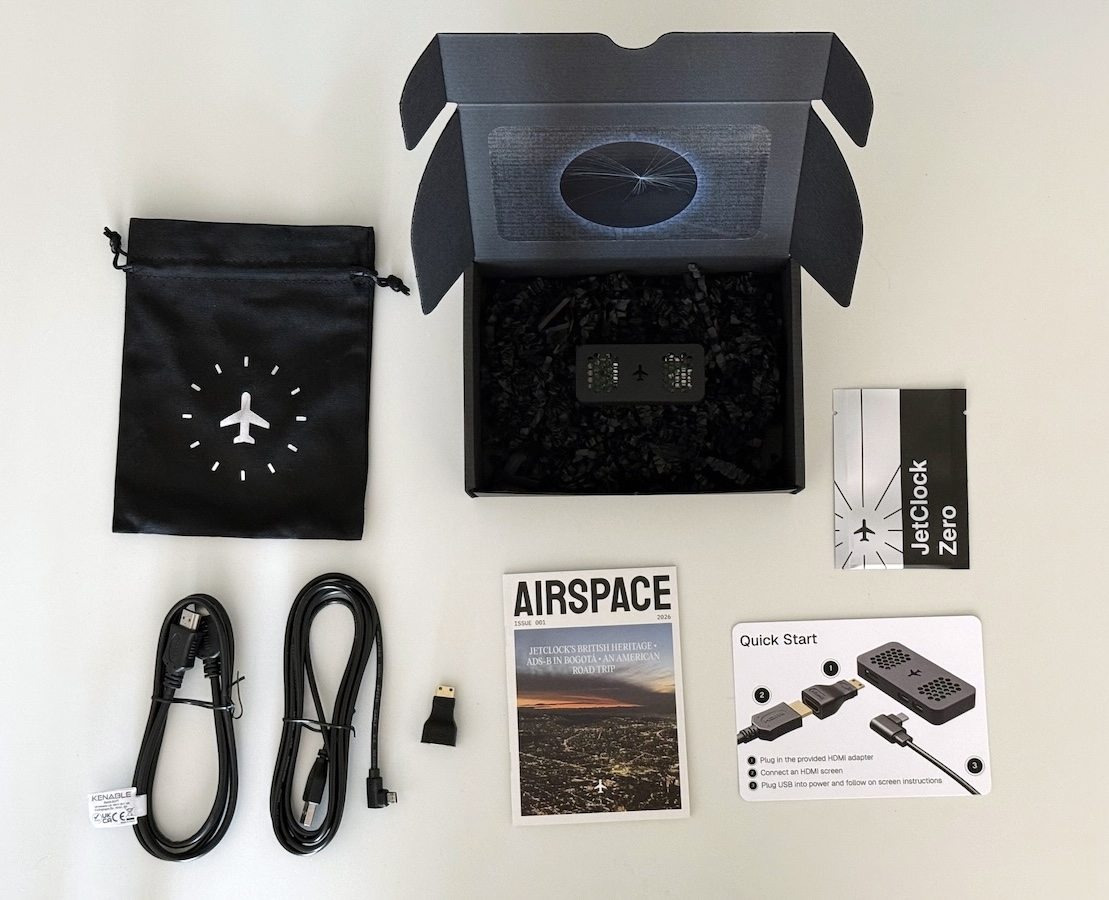
Check you have all the items included
| Quantity | Description |
|---|---|
| 1x | JetClock Zero device |
| 1x | HDMI cable |
| 1x | Mini-HDMI adapter |
| 1x | USB power cable |
| 1x | Airspace magazine |
If anything is missing from your kit, just get in contact with us via email at [email protected]
Setup instructions
Get your JetClock Zero running in 5 easy steps
First, plug the mini-HDMI adapter into the JetClock Zero device. Then connect the HDMI cable between the adapter and your screen's HDMI port.
The mini-HDMI adapter goes into the JetClock Zero device first, then the regular HDMI cable connects to your display.
Plug the other end of the HDMI cable into any HDMI screen - this could be a monitor, TV, projector, or even a specialised round display.
JetClock Zero works with any display that has an HDMI input, from tiny 2-inch screens all the way up to large TVs.
Connect the USB power cable to the JetClock Zero device and plug it into a power source. The system will begin booting immediately.
Make sure to use a reliable USB power source. We recommend using a wall adapter rather than powering from a TV's USB port, as TV USB ports may not provide consistent power.
The system will boot up - this takes about 1-2 minutes. Don't worry if the screen orientation seems wrong at first - this can be changed in the settings later.
You'll see the JetClock logo appear, followed by the setup screen. If the display is rotated incorrectly, don't worry - you can fix this in the configuration settings.
Once the system has fully booted (after 1-2 minutes), JetClock Zero will create its own WiFi hotspot called "JetClock". Connect to this network from your phone or computer, then navigate to jetclock.local to configure your WiFi settings. For detailed WiFi connection instructions, see our WiFi Connection Guide.
After successful WiFi connection, the clock will reboot and then display a QR code for registration.
After connecting to WiFi and rebooting, JetClock Zero will display a QR code on screen. Scan this QR code to complete registration and start detecting aircraft!
If you can't scan the QR code, you can register manually using the Clock ID shown below the QR code.
Screen Orientation
If your display appears rotated or upside down, don't worry! You can easily change the screen orientation in the settings:
- Connect to your JetClock via the web interface
- Navigate to Display Settings
- Select your preferred orientation (0°, 90°, 180°, or 270°)
- The change will apply immediately
Compatible Displays
JetClock Zero is incredibly versatile and works with:
- Standard monitors and TVs (any size)
- Round HDMI displays (perfect for the classic clock look)
- Small screens (2 inches and up)
- Projectors
- Specialty displays
The interface automatically adapts to your screen's resolution and aspect ratio.
FAQs
Need Help?
If you encounter any issues during setup, check out our WiFi Configuration Guide or Troubleshooting Guides.
For additional support, contact us at [email protected]
© 2026 JetClock. Made in London 🇬🇧